
Air Fryer Nashville Hot Chicken Tenders Recipe
A published air-fryer method with a gentler starting option for the chile finish. Use a thermometer rather than browning alone.
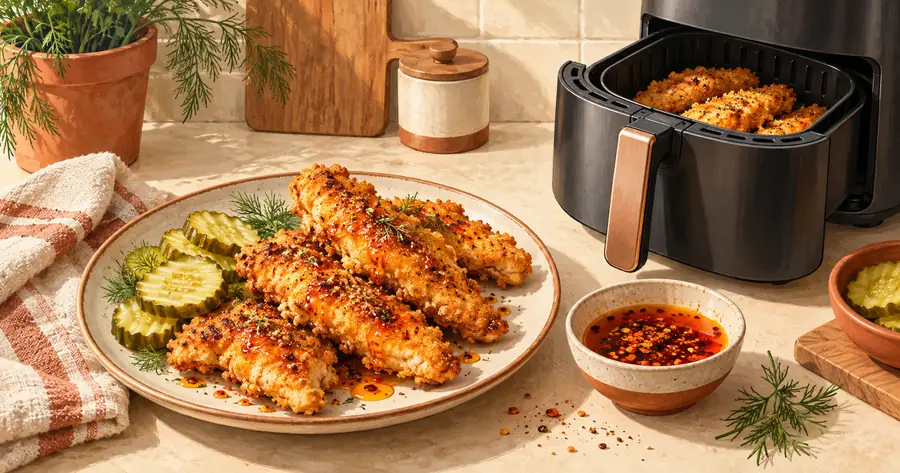
The tricky part of air-fryer hot chicken is the coating. A thick patch of dry flour can stay pale while the chicken underneath keeps cooking. A thin coating, light oil coverage and space around each tender give you a more useful starting point than simply turning up the heat.
Preheat to 375°F. Cook coated tenderloins in a single layer and turn them partway through. A published method uses about 10 to 12 minutes per batch, but every piece must reach 165°F inside. Add the spicy finish after cooking so you can control how much each person receives.
What this home recipe is based on
This guide adapts the air-fryer Nashville hot chicken recipe published by Tennessee’s Working for a Healthier Tennessee program. The flour, egg and buttermilk method comes from that recipe. The lower-cayenne starting option below is an adjustment for readers who want to build heat slowly.
This site has not kitchen-tested the adaptation. It is a home-style recipe, not Dave’s private formula or a match for its named spice levels. Our Nashville hot chicken guide explains the broader food style.
Ingredients for about six portions
Use thawed raw chicken tenderloins of similar thickness. You will also need a food thermometer, two shallow dishes and clean tongs for the cooked food.
- 2 pounds chicken tenderloins
- 2 tablespoons dill pickle brine, divided
- 2 tablespoons hot pepper sauce, divided
- 1 teaspoon salt, divided
- 1 cup all-purpose flour
- ½ teaspoon ground black pepper
- 1 large egg
- ½ cup buttermilk
- Cooking oil spray suitable for your appliance
For the finish, combine ½ cup olive oil, 2 tablespoons dark brown sugar, 1 teaspoon paprika, 1 teaspoon chili powder and ½ teaspoon garlic powder. Start with 1 teaspoon cayenne if you want a gentler trial. The published version uses 2 tablespoons cayenne, which is a much stronger starting point. Keep dill pickle slices for serving.
The portion count is a planning guide. Tender size and the sides you serve will affect how far the meal goes. Do not use the illustration to estimate the weight of a serving.
Marinate, coat and cook
- Refrigerate the chicken. Combine 1 tablespoon each of the pickle brine and hot sauce with ½ teaspoon salt. Turn the chicken in the mixture. Cover and refrigerate for at least one hour. Keep it cold while preparing the coating.
- Set up two dishes. In one, mix flour, pepper and the remaining salt. In the other, beat the egg with buttermilk and the remaining brine and hot sauce.
- Build a light coating. Drain the chicken and discard its marinade. Coat each piece in flour, dip in the egg mixture, then coat in flour again. Shake away loose excess.
- Prepare the basket. Preheat to 375°F and grease the cooking surface as your appliance manual allows. Arrange a single layer with gaps. Mist the coating lightly.
- Turn and finish. Cook for about 5 to 6 minutes. Turn carefully and mist any dry areas. Cook for roughly another 5 to 6 minutes, then check the internal temperature. Continue cooking any piece below 165°F.
- Season the cooked food. Stir the finish thoroughly and brush a small amount over the cooked tenders. Taste a cooked piece before deciding whether to add more. Serve with pickles.
Discard the flour and egg mixture used for raw chicken. Use a clean plate and clean utensils for the cooked batch. Do not rinse raw chicken before preparing it.
The thermometer decides when chicken is ready
USDA guidance puts the safe minimum for poultry at 165°F. Insert the thermometer into the thickest part. For a narrow tender, entering from the side can help position the tip in the center.
Check more than one piece, especially when their sizes differ. A browned coating does not establish the temperature inside. Thicker pieces, a crowded basket or a different appliance can change the cooking time.
The estimate above applies to thawed raw tenderloins. Frozen breaded products have their own package instructions. Do not assume that a browned frozen product is already fully cooked.
Why the coating can turn patchy or fall off
| Problem | What to change next time |
|---|---|
| Loose white flour remains | Shake off more excess and lightly mist dry areas |
| Pieces steam together | Leave gaps and cook another batch |
| Coating tears on turning | Use a thin turner and handle each piece gently |
| Finish tastes too hot | Keep some cooked tenders unseasoned and use less finish |
A basket has a surface limit as well as a weight limit. Doubling the ingredients may require twice as many batches. Stacking the chicken is not an equal substitute for giving it enough cooking space.
Plan the sides and leftovers
Make homemade kale slaw before handling raw chicken. Keep it refrigerated while the tenders cook. A small bowl of creamy dipping sauce can be served separately.
Follow USDA leftover guidance: refrigerate promptly at 40°F or below. Do not leave perishable food out for more than two hours, or one hour above 90°F. Use refrigerated cooked chicken within three to four days and reheat it to 165°F.
For a less oily serving, brush on only the amount of finish you want. Air frying does not remove the oil added afterward. If you are comparing the home meal with restaurant choices, the Dave’s Hot Chicken menu describes the actual menu formats. At home, make the first batch about even cooking and a manageable amount of heat.
If you prefer a pot-fried flour coating, the homemade fried hot-chicken method explains that separate process and its hot-oil precautions. Keep the appliance-specific times with the recipe they belong to.


