
Oven-Baked Nashville Hot Chicken Tenders Recipe
A crumb-coated home version for a standard oven. The spicy finish goes on after the chicken reaches its safe internal temperature.
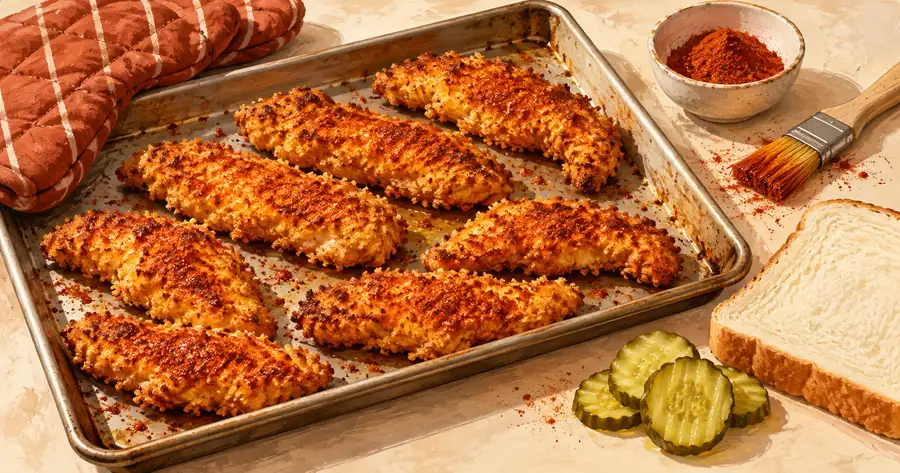
An oven tray can be a useful choice when a small air-fryer basket would need several batches. The challenge is keeping the underside of the chicken from sitting in moisture. Space the tenders well and turn them carefully before adding the spicy finish.
Bake thawed crumb-coated tenders at 425°F. Start checking around 15 minutes and cook until every piece reaches 165°F. Allow roughly 18 to 25 minutes as a planning range, with extra time if needed. Brush on a small amount of seasoned oil after baking.
A home variation with a different coating
This recipe uses breadcrumbs for an oven-friendly crust. The general idea of a crumb coating also appears in the University of Minnesota’s oven-fried chicken recipe. Its larger bone-in cuts and cooking schedule are different from the tenderloins used here.
The quantities and tender method below are a home adaptation that this site has not kitchen-tested. It is not Dave’s recipe. If you want the air-fryer method instead, use the air-fryer tender guide rather than transferring its shorter timing to a standard oven.
Gather the chicken and coating ingredients
This batch uses 2 pounds of thawed raw chicken tenderloins. It can serve about four people as a main dish with sides, depending on appetite and tender size. Choose pieces of similar thickness so that the tray cooks more evenly.
- 2 pounds raw chicken tenderloins
- ½ cup all-purpose flour
- 2 large eggs
- 2 tablespoons milk
- 2 cups plain panko breadcrumbs
- 1 teaspoon paprika
- 1 teaspoon garlic powder
- 1 teaspoon fine salt
- ½ teaspoon ground black pepper
- 2 tablespoons neutral cooking oil for the crumbs
- A little additional oil for greasing the tray
For a small batch of spicy finish, use 3 tablespoons neutral oil, 1 tablespoon paprika, ½ teaspoon cayenne, 1 teaspoon brown sugar and ½ teaspoon garlic powder. These are starting amounts for a home seasoning. They do not correspond to a restaurant heat label.
You will need a rimmed baking sheet, three shallow dishes, a turner and a food thermometer. Check that your tray gives each piece room. Use two trays or cook in batches if the tenders would otherwise touch.
Coat the tenders without making a heavy shell
- Heat the oven. Preheat to 425°F. Lightly grease a rimmed metal baking sheet. Set out a clean plate for the finished chicken.
- Arrange the coating dishes. Put flour in the first dish. Beat eggs and milk in the second. Mix panko, paprika, garlic powder, salt, pepper and the 2 tablespoons oil in the third.
- Coat each piece. Dust the chicken with flour and shake off excess. Dip into the egg mixture. Press lightly into the crumbs so they adhere on both sides.
- Space the tray. Lay each piece flat with a gap around it. Do not stack pieces or pile extra loose crumbs underneath them.
- Bake and turn. Bake about 10 minutes, then turn gently. Start checking the internal temperature around 15 minutes total. Keep baking until the thickest parts reach 165°F.
- Add the finish. Mix the finishing oil and spices in a separate clean bowl. Brush a light coating onto the cooked tenders. Serve immediately with any remaining clean finish on the side.
Cooking time is an estimate for this untested home adaptation. Your oven, tray and chicken thickness can change it. Remove pieces as they reach the safe temperature if smaller tenders finish before larger ones.
Use temperature instead of the color of the crumbs
USDA recommends 165°F for poultry. Check the center of the thickest part without touching the tray. Test several pieces across the baking sheet.
Crumbs can look golden before a thick piece is safely cooked. They can also stay fairly light while thinner chicken finishes. If the chicken has reached 165°F, continuing to bake just to darken the coating may dry it out.
Do not taste the used coating mixture. Flour, crumbs and egg that touched raw poultry need to be discarded. Keep the brush for the finishing oil separate from anything used on raw chicken.
Make the finish suit the whole meal
The finishing mixture is a seasoned oil rather than a smooth creamy dip. Stir it before each use because the spices can settle. Start with a light brushful on one cooked tender and decide whether the amount suits you.
If you want less chile heat, reduce the cayenne before mixing. Increasing brown sugar does not remove cayenne already in the batch. The seasoning and spicy-oil guide explains the difference between changing the blend and changing how heavily you apply it.
The recipe has wheat, egg and milk ingredients. Substituting another coating or binder changes the recipe and may change how it cooks. Check every product label for your own dietary needs.
What to do about a soft underside
First check tray crowding. Closely packed pieces trap more moisture around the coating. A second tray gives the chicken more space. If you use two oven racks, rotate the trays and check pieces on both trays rather than assuming they cook at the same rate.
Turn the tenders with a thin spatula instead of scraping at them with tongs. Coating that has stuck can tear if pulled sharply. Letting a piece release gently is more useful than dragging it across the pan.
Keep wet slaw and sauces separate until serving. Spoon the kale slaw beside the chicken or add it to a sandwich just before eating.
Store the meal before it sits out too long
USDA leftover guidance calls for prompt refrigeration at 40°F or below. Refrigerate within two hours, or one hour when the temperature is above 90°F. Use cooked chicken within three to four days and reheat to 165°F.
Store the cold slaw and dipping sauce separately. Reheating may change the coating texture, so do not promise yourself that leftovers will have the same crunch as the first serving.
For restaurant portions and products, return to the Dave’s Hot Chicken menu. For this oven version, the key choices are a light crumb coating, enough tray space and a thermometer check before the spicy finish goes on.


